Your Cart is Empty
Convert PSD to vector
Within professional graphics workflows, converting PSD documents into vector-based assets is frequently requested but often misunderstood. A PSD (Photoshop Document) is fundamentally a raster-centric container, designed around pixel matrices, layer compositing, masks, and effects. Vector formats, by contrast, store geometric descriptions.
This distinction is not cosmetic — it defines what is technically possible.
A PSD file may contain vector elements (shape layers, smart objects, text outlines), but the document model itself is not vector-native. Simply exporting or “saving as AI/EPS/SVG” does not guarantee vector geometry. Containers do not enforce content structure.
In production contexts, PSD → vector is therefore not a file conversion but a reconstruction task:
-
Raster information cannot be mathematically converted into curves
-
Edge interpretation always introduces approximation
-
Automated tracing generates geometry, not true design intent
Understanding this prevents common downstream failures in print, cutting, plotting, and CAM-driven workflows.

What is a Vector File?
Vector files are more than just digital images. Vector files store graphics as mathematical primitives, not pixels. Shapes are defined through coordinate systems, Bézier curves, path topology, and transformation matrices. Visual appearance is derived from geometry rather than resolution.
Key properties of vector geometry:
-
Resolution-independent scaling
-
Explicit curve definitions
-
Editable node structures
-
Device-independent rendering logic
However, a critical technical clarification is required:
Formats such as AI , EPS, SVG, and PDF are containers, not guarantees of vector data.
Each of these formats can legally embed raster images. The extension alone reveals nothing about geometric integrity. A PDF can contain only bitmaps; an SVG can contain only embedded PNG data.
From a production perspective, vector validity depends on path structure, not format selection.
PSD vs Vector Formats – Structural Differences
PSD documents are optimised for:
-
Pixel-based image manipulation
-
Layer compositing & blending
-
Filters & raster effects
-
Resolution-dependent rendering
Vector formats operate on:
-
Paths & curves
-
Node topology
-
Fill/stroke definitions
-
Transform matrices
Because raster data is discrete while vector geometry is continuous, no deterministic conversion exists between the two domains. Any PSD → vector workflow requires interpretation.
Typical reconstruction strategies include:
-
Manual redraw (preferred for production-critical assets)
-
Algorithmic tracing (approximation-driven)
-
Hybrid workflows (trace + curve correction)
Each method involves trade-offs between geometric cleanliness, editability, and fidelity.
Why Choose Vector Files?
The advantages of vector graphics are often presented simplistically. In practice, benefits emerge from geometric behaviour rather than format choice.
Scalability
Vector graphics scale through matrix transformations rather than pixel interpolation. No resampling artefacts occur because geometry is recalculated, not stretched.
Editability
Objects remain structurally editable via nodes and curves. However, editability is meaningful only when path topology is coherent. Traced vectors with inflated nodes may be technically editable but operationally unstable.
File Efficiency
Vectors may be smaller than high-resolution rasters, but complexity governs size. Poor tracing can produce excessively large files due to node inflation and redundant paths.
Production Compatibility
Devices such as cutters, plotters, laser systems, and RIP engines interpret geometry. Clean path construction directly affects output stability, cutting precision, and render reliability.

Convert PSD to AI Vector / Convert PSD to Illustrator Vector
Converting a PSD to an AI file that actually contains vector geometry is a reconstruction workflow. Opening a PSD in Illustrator only places raster content into an Illustrator container; it does not create paths. The steps below are the production-grade route to a usable Illustrator vector deliverable.
Step 1 — Triage the PSD: what can be vector, what must remain raster
Why: Illustrator can only “vector” what can be expressed as paths and fills. Photos, noise, textures, blur/glow and most layer-style looks are raster phenomena.
-
Vector candidates: flat shapes, hard-edge icons, type, simple logos, line art
-
Raster-only: photos, gradients-with-texture, film grain, heavy shadows, soft glows
QC check: if an element’s identity depends on continuous tone texture, don’t force it into vectors unless the brief explicitly allows stylization.
Step 2 — Establish target constraints before drawing any paths
Why: Geometry rules differ for print vs cutting vs general editability.
Define:
-
final size(s) and minimum feature size
-
color model expectations (spot/CMYK/RGB)
-
whether strokes must remain strokes or be expanded
-
whether text must stay editable or be outlined for portability
QC check: if the output is for cutting/plotting, assume you will need clean closed paths, minimal overlaps, and often expanded strokes.
Step 3 — Bring the PSD into Illustrator as a locked reference
Why: The PSD is your visual reference, not your vector source.
-
Open or Place the PSD in Illustrator
-
Keep it on a dedicated Reference layer
-
Lock it; reduce opacity if needed
Failure mode: accidentally editing or exporting the PSD layer and assuming it became vector.
Step 4 — Extract any real vector content already present (if applicable)
Why: Some PSDs include shape layers or embedded vector Smart Objects. If you can recover actual vector sources, you avoid tracing altogether.
-
Identify: text layers, shape layers, Smart Objects
-
If a Smart Object originated from AI/PDF, use the original vector source where possible rather than redrawing from pixels
QC check: don’t treat “sharp-looking” pixels as vectors. Confirm by selecting: vectors have anchor points; rasters don’t.
Step 5 — Rebuild primary shapes with controlled Bézier geometry (preferred method)
Why: Production-grade vectors come from intentional topology, not from auto-trace.
-
Use shape tools for primitives (rectangles, circles) when appropriate
-
Use the Pen tool for contours that require curvature control
-
Keep curves continuous: fewer anchors with correct tangency beats many anchors approximating the same outline
Failure modes to avoid:
-
over-pointing (node inflation)
-
wobbly curvature (micro-segments)
-
mismatched symmetry (left/right inconsistencies)
QC check: switch to Outline/Wireframe view and evaluate smoothness by geometry, not by fill preview.
Step 6 — Handle typography correctly (don’t “trace” text)
Why: Tracing text creates unstable outlines and spacing artefacts.
-
If fonts are available: rebuild as live text for accuracy and editability
-
If the file must be portable: convert to outlines after confirming layout, kerning, and baseline alignment
-
If fonts are not available: redraw or replace, but keep a record of the substitution
QC check: after outlining, inspect for extra points around tight curves (common in auto-generated outlines) and simplify where needed without destroying character shapes.
Step 7 — Only trace when manual reconstruction is not viable, and treat the result as a draft
Why: Auto-trace is edge interpretation; it routinely generates noisy geometry.
If you must use tracing:
-
Trace only the parts where stylization is acceptable
-
Immediately perform cleanup: simplify paths, remove specks/islands, merge regions, correct corners
-
Rebuild critical contours manually on top of the trace if the output is production-critical
QC check: look for “hairy” outlines in wireframe—if the edge looks fuzzy in outline view, the cutter/RIP will “see” that fuzz.
Step 8 — Normalize strokes, joins, and overlaps for the intended output
Why: Many downstream systems interpret strokes and overlaps differently than Illustrator preview.
-
Decide whether strokes must be expanded (common for cutting/plotting)
-
Remove hidden overlaps that cause double edges/double cuts
-
Ensure fills are truly closed shapes (no micro gaps)
QC check: select suspicious paths and check end points; open paths masquerading as closed shapes are common after tracing.
Step 9 — Apply gradients/effects last, and keep them separate from geometry decisions
Why: Effects can mask structural issues and may rasterize in some export/print contexts.
-
Build correct geometry first
-
Then apply gradients/effects to match the intended appearance
-
Avoid relying on effects to “hide” a poor edge; fix the edge
QC check: toggle effects off/on. If the design collapses without effects, you likely encoded visual intent into non-portable rendering tricks.
Step 10 — QC the AI as a vector file (content verification, not extension)
Why: AI is a container. You must verify the content is actually vector.
Minimum verification:
-
Outline view: all critical artwork appears as paths, not as a single placed image box
-
Selectability: objects select as individual shapes with anchor points
-
Node inspection: anchors are economical; curves are stable; no excessive micro nodes
-
Raster residue: no hidden placed/embedded raster elements in areas that are supposed to be vector
Pass/fail rule: if deleting/hiding the reference layer removes “the design,” you didn’t build vectors—you only placed a bitmap.
Step 11 — Save the deliverable as AI (and optionally a production PDF/EPS if required)
Why: Saving preserves the Illustrator document model. Export formats don’t “add vector” if geometry isn’t present.
-
Save as AI for editable master
-
If the pipeline needs it: export a PDF/EPS after QC (still verify, since these can embed raster)
QC check: reopen the saved AI and repeat Outline/selectability checks to confirm nothing rasterized during save/export.
Convert PSD to Vector in Photoshop
Photoshop is architecturally a raster editor. Any “vectorisation” performed inside Photoshop is limited to vector shape layers and masks within a raster-centric document model. This distinction is critical: creating vector shapes in Photoshop does not transform the PSD into a vector-native file. The PSD remains a container primarily designed for pixel data.
A Photoshop-based vector workflow is therefore best understood as shape reconstruction, not true raster-to-vector conversion.
Photoshop Vector Conversion Method (Geometry Reconstruction)
Step 1 — Classify which elements are structurally suitable for vector shapes
Why: Not all raster content has a meaningful vector equivalent.
Appropriate candidates:
-
Hard-edge graphics (logos, icons, flat shapes)
-
Regions with clean boundaries
-
Elements intended for geometric scaling
Poor candidates:
-
Photographs
-
Noise / texture-driven imagery
-
Soft gradients, glows, blur, shadows
QC check: If visual identity depends on continuous tone variation, forcing vector shapes will either fail or produce excessive complexity.
Step 2 — Rebuild shapes using vector shape layers (do not “convert pixels”)
Why: Photoshop does not mathematically convert raster edges into curves. Vector data must be explicitly defined.
Workflow logic:
-
Use Shape tools for parametric primitives (rectangles, ellipses, polygons)
-
Use the Pen tool for controlled Bézier path construction
-
Construct shapes intentionally rather than tracing anti-aliased edges
Failure modes to avoid:
-
Over-tracing pixel boundaries → produces unstable curvature
-
Excessive anchor points → complicates downstream interpretation
-
Assuming selections automatically become clean vectors
QC check: Inspect the Paths panel. True vector shapes appear as editable paths, not selections or pixel masks.
Step 3 — Use the Pen tool for contour-critical geometry
Why: Precision vectors require curvature control, not pixel inference.
Best practice:
-
Minimise anchor count while preserving curvature
-
Maintain smooth tangency across curve transitions
-
Avoid micro-segments that introduce geometric noise
Production logic: Stable curves are defined by geometry continuity, not by how accurately they hug pixel artefacts.
Step 4 — Prefer vector masks over destructive pixel edits
Why: Vector masks define geometry boundaries without modifying underlying raster data.
Advantages:
-
Resolution-independent edges inside the PSD
-
Non-destructive adjustments
-
Cleaner reconstruction workflows
Important limitation: Vector masks improve editability but do not convert the document into a vector file usable for cutting, plotting, or CAD-style interpretation.
Step 5 — Evaluate appearance vs geometry before export
Why: Photoshop layer effects simulate visual styling but are not vector constructs.
Layer styles such as:
-
Drop shadows
-
Outer glows
-
Bevel / emboss
-
Blur-based effects
…have no direct vector equivalent. During export, these effects may rasterise or be flattened depending on the container and renderer.
QC check: Disable effects temporarily. Confirm that shape identity survives without raster-dependent styling.
Step 6 — Export using Photoshop PDF (container behaviour awareness)
Why: Photoshop PDF is a container capable of storing vector shapes and raster content simultaneously.
Key realities:
-
Vector shape layers remain vector inside the PDF
-
Raster layers remain raster
-
Transparency/effects may flatten depending on compatibility settings
Critical clarification: Saving as PDF does not make raster elements vector. The container preserves existing data types; it does not reinterpret them.
Photoshop Conversion Considerations (Production Constraints)
Layer Effects Are Not Geometry
Photoshop effects are rendering instructions. In vector-driven workflows (Illustrator, RIP engines, cutters), these instructions may flatten into pixels or behave inconsistently.
Vector Masks Improve Editability, Not Vector Integrity
Vector masks are valuable for internal PSD workflows but do not guarantee compatibility with geometry-driven production systems.
PSD Remains Raster-Centric
Even with vector shapes present, the PSD file structure is not equivalent to a vector-native document model like Illustrator or SVG-based editors.
Quality Control for Photoshop-based Vector Workflows
Verification should be structural rather than visual:
-
Confirm paths exist in the Paths panel
-
Inspect anchor density and curve smoothness
-
Identify unintended pixel masks
-
Detect raster-only dependencies
Visual crispness at 100% zoom is not evidence of vector correctness.

Convert PSD to vector online
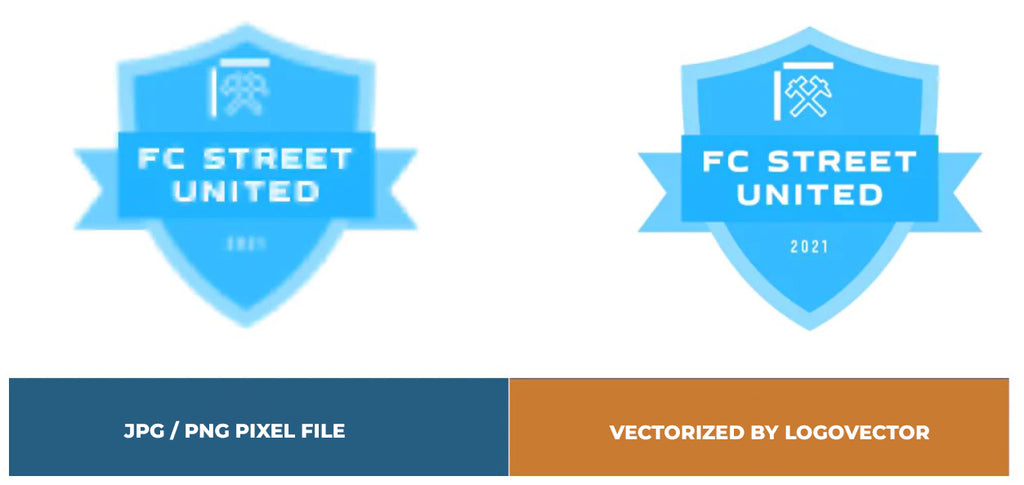
We are happy to help you on your way with the vectorization of your logo or image. You send us the logo in JPG, PNG or PDF and we convert the logo into an EPS vector file using Adobe Illustrator. We use the pen tool and recreate the logo manually with the correct fonts. Then we export the new vector logo in an EPS file so you can get started!
Advantages of vector file creation by Logovector:
- Perfect quality (Made by designers with 10+ years of experience)
- We vectorize images, photos, logos and drawings
- Fast delivery within 10 hours
- All necessary file types: EPS, AI, SVG, PDF
- Very easy to order via the website
- Small adjustments are possible
- One-time payment (very attractive price)