Your Cart is Empty
How to create a vector file?
What is a vector file?
A vector file is an image defined by mathematical paths, not pixels. The artwork is constructed from curves, lines, and nodes that describe geometry rather than fixed color samples.![]()
Structural distinction:
-
Vector graphics → paths, curves, coordinates
-
Raster graphics (JPG / PNG) → pixel matrix, resolution-bound
Because vectors are geometry-based, scaling does not rely on interpolation. Shapes are recalculated at any size, preserving edge clarity and structural precision.
Important nuance:
Raster images can be enlarged technically, but no new detail is created. Pixels are simply resampled, which often introduces softness or artifacts. Vector graphics avoid this limitation entirely because there is no pixel grid to stretch.
Why vectors matter in production workflows:
✓ Resolution-independent scaling
✓ Clean edge reproduction
✓ Stable behavior in print and RIP engines
✓ Suitable for cutting / plotting systems
For many printing applications — including logos, signage, stickers, textiles, and promotional products — vector geometry is preferred or required.
How do I make an image into a vector file?
Transforming an image into a vector file is not a simple format change. A raster image must be reconstructed into paths. This can be achieved through automated tracing or manual geometric rebuilding, depending on quality requirements.
Several software environments support vector workflows, but they differ significantly in capability and output control.
Overview of common vectorization routes
Vector-native applications (geometry-first)
These applications are designed to create and manage paths directly.
Adobe Illustrator
✓ Industry-standard vector editor
✓ Automated tracing (Image Trace)
✓ Precise node and curve control
✓ Reliable EPS / SVG / PDF output
Inkscape (free, open source)
✓ Full vector editing capabilities
✓ Trace Bitmap for reconstruction
✓ EPS / SVG / PDF export
✗ More manual cleanup often required
CorelDRAW (widely used in production)
✓ Vector-native workflow
✓ Tracing and geometry tools
✓ Strong signmaking integration
These tools operate on geometry rather than pixels, making them structurally appropriate for vector reconstruction.
Raster-native applications (pixel-first)
These programs are designed primarily for pixel editing.
Adobe Photoshop
✓ Can create paths manually
✓ Can save EPS containers
✗ No true automated vectorization engine
✗ EPS output typically raster-based
Photoshop can assist with manual path drawing, but it is not a vectorization tool in the conventional production sense.
Illustration-first environments
Some drawing applications can generate vector data but are not optimized for technical vector reconstruction.
Procreate
✓ Excellent for illustration
✗ Raster-based internally
✗ Vector export not native
Procreate artwork typically requires transfer to a vector editor for production use.
Unsupported or limited vector workflows
Certain popular design tools are often misunderstood.
Canva
✗ No true vector reconstruction tools
✗ Exports may use vector containers, but editing/control is limited
Vector file creation requires path-level control, which Canva does not provide.
Critical nuance: vector file ≠ vector quality
Generating a file with an EPS, SVG, or PDF extension does not guarantee:
✓ Clean geometry
✓ Minimal nodes
✓ Stable curves
✓ Production suitability
Vector quality is defined by path logic and geometric efficiency rather than format alone.
Automated tracing tools accelerate workflows but commonly introduce:
✗ Node inflation
✗ Irregular curves
✗ Fragmented shapes
Manual reconstruction is often required for precision-critical graphics such as logos and brand assets.
How to create a vector file from PNG
How to create a vector file from PNG
We often get the question: is PNG a vector file? Or is JPG a vector file? The answer is no. PNG and JPG are raster formats (pixel-based). They describe a grid of pixels, not geometric paths. When a print shop asks for “EPS”, they usually mean vector geometry inside an EPS container—not simply a file that ends with .eps.
Common vector containers / extensions include:
-
EPS (container; may contain vector or raster)
-
AI (Illustrator source; typically vector)
-
PDF (container; may contain vector or raster)
-
SVG (web-native vector)
Critical nuance (production-relevant):
Changing the file extension does not create vector geometry. A “vector file from PNG” requires reconstruction of shapes into paths (automated tracing or manual drawing).
We can teach the workflows for JPG / PNG / PDF, but you need to understand what a vector file is: paths, curves, nodes, and the ability to scale without interpolation.
How to create a vector file in Illustrator
Illustrator is a vector-native application and is one of the most common tools for creating production-ready vector files. However, it’s important to frame the process correctly: converting PNG/JPG to vector is not “free magic”. It’s geometric reconstruction. Illustrator’s Image Trace can be the fastest starting point, but it rarely produces a brand-accurate, clean vector without inspection and cleanup.

If you need an identical, stable logo vector, you usually end up with some degree of manual correction (or full Pen Tool reconstruction).
Step-by-step tutorial — Create vector from JPG/PNG in Illustrator (Image Trace + QC)
Step 1 — Place the image correctly
-
Open Illustrator
-
File → Place… → choose your JPG/PNG
-
Avoid pasting the image into the document
Why: placed images preserve predictable scaling and reduce hidden transform issues.
Step 2 — Inspect raster quality before tracing
Zoom to 200–400% and check:
-
JPG artifacts (blockiness / halo noise)
-
soft edges
-
tiny details that will not survive print
-
background noise
Why: Image Trace turns defects into nodes and micro-shapes.
Step 3 — Open Image Trace controls
-
Select the image
-
Window → Image Trace
Critical nuance: the trace you see initially is a preview. It becomes real geometry only after expansion.
Step 4 — Choose a tracing mode that matches the artwork
-
Black & White → line art, single-color logos
-
Color → flat color logos (limited palette)
-
Grayscale → tonal artwork (often problematic for production)
Why: mode defines segmentation logic (what becomes shape vs background).
Step 5 — Use a preset as a starting point (not an outcome)
Presets like High Fidelity Photo and Low Fidelity Photo are not “better” or “worse” universally:
-
High Fidelity often creates excessive geometry (node inflation)
-
Low Fidelity can destroy shape intent
For logos, start with logo-appropriate presets (B/W or limited color), then adjust.
Why: more “detail” usually means more anchors, not better production behavior.
Step 6 — Adjust the parameters deliberately
Key controls that affect vector structure:
Threshold / Colors
→ controls shape detection
Paths
→ higher = closer outline, more nodes
Corners
→ affects corner retention (can increase jaggedness)
Noise
→ filters micro-artifacts (often essential for JPGs)
Why: you’re balancing visual similarity against geometric stability.
Step 7 — Expand to create real vector paths
-
Click Expand
(or Object → Image Trace → Expand)
Why: until Expand, you do not have editable vector objects.
Step 8 — Cleanup (this is where vector quality is decided)
After expansion, inspect for:
-
excessive anchor points on smooth curves
-
fragmented shapes
-
stray micro-objects
-
unwanted overlaps
Typical corrections:
✓ delete artifacts
✓ merge shapes where logical (Pathfinder)
✓ simplify cautiously (small increments)
✓ fix key curves manually with the Direct Selection tool
Why: auto-trace output is rarely production-stable without refinement.
Step 9 — QC in Outline View (non-negotiable)
Switch to View → Outline and inspect:
✓ path continuity
✓ node density
✓ curve smoothness
✓ hidden junk geometry
Why: preview can look fine while geometry is structurally poor.
Step 10 — Save correctly (master + delivery)
Best practice:
-
Save an editable master: AI
-
Export as required: EPS or PDF (and SVG if needed)
Why: EPS/PDF are often client/printer deliverables; AI is your source of truth.
When Image Trace is not enough (Pen Tool reconstruction)
If you need a truly identical and stable logo vector, Image Trace can be the wrong approach. Manual reconstruction typically yields:
✓ clean Bezier curves
✓ minimal anchor points
✓ predictable production behavior
✓ better cutting/plotting stability
Benefits (technically framed)
✓ Can produce true vector geometry
✓ You control export formats (EPS/AI/PDF/SVG)
✓ Suitable for production workflows when geometry is clean
Cons (real constraints)
✗ Subscription cost
✗ Learning curve (paths, nodes, QC)
✗ Tracing output often needs cleanup
✗ Manual reconstruction is time-intensive
How to create a vector file in Photoshop?
Photoshop is fundamentally a raster editor, not a vectorization tool. That distinction is critical. Photoshop manipulates pixels. Vector graphics require paths and geometric curves.

While Photoshop includes shape layers and path tools, it does not provide automated raster-to-vector reconstruction comparable to vector-native applications. Any vector result inside Photoshop is therefore created by manual path construction, not conversion.
Important baseline:
-
JPG / PNG → pixel-based raster data
-
Vector graphics → paths / curves / nodes
-
Saving/exporting formats ≠ generating vectors
Photoshop can produce EPS files and can store paths, but the workflow and output constraints differ significantly from Illustrator or Inkscape.
Critical limitation before starting
Not every image is a good candidate for manual path reconstruction. Photoshop vector workflows are realistic mainly for:
✓ Simple logos
✓ High-contrast graphics
✓ Clean silhouettes
✓ Limited detail artwork
Poor candidates include:
✗ Photographs with texture
✗ Soft gradients
✗ Complex shading
✗ Noisy JPGs
Why this matters:
Photoshop does not reconstruct geometry automatically. Complex imagery becomes impractical to redraw manually.
Step-by-step tutorial — Create vector paths from a JPG in Photoshop (manual reconstruction workflow)
This workflow does not convert pixels into vectors. It describes manually rebuilding shapes using Photoshop’s path engine.
Step 1 — Prepare and clean the raster image
-
Open Photoshop
-
File → Open → select JPG / PNG
-
Zoom to 200–400% and inspect edges
Optional corrections:
✓ Increase contrast for clearer edges
✓ Remove distracting background elements
✓ Reduce compression noise
Why: clean edges improve path accuracy. Photoshop cannot infer missing geometry.
Step 2 — Separate the subject from the background (if required)
Use selection tools appropriate to the image:
✓ Select Subject
✓ Quick Selection Tool
✓ Pen Tool (for precision)
Refine the selection if needed.
Why: vector paths require clear shape boundaries.
Step 3 — Convert selection into a Work Path
With an active selection:
-
Open the Paths panel
-
Choose Make Work Path
Tolerance considerations:
-
Lower tolerance → more anchor points
-
Higher tolerance → smoother but less accurate paths
Why: this step creates geometric paths from pixel selections, but quality depends on edge clarity.
Step 4 — Inspect and refine the generated path
Select the Direct Selection Tool (A).
Check for:
✓ Excess anchor points
✓ Jagged curves
✓ Unwanted micro-segments
✓ Path irregularities
Manual refinement:
✓ Adjust Bézier handles
✓ Remove unnecessary points
✓ Smooth curve transitions
Why: automated path generation from selections often produces unstable geometry.
Step 5 — Convert Work Path into Shape Layer (optional but practical)
From the Paths panel:
✓ Convert path to shape layer
Why: shape layers behave more predictably and maintain fill/stroke logic.
Step 6 — Repeat reconstruction for all logo elements
Complex artwork usually requires multiple separate paths.
Why: combining everything into one path reduces editability and structural clarity.
Step 7 — Exporting as EPS (container output)
-
File → Save As…
-
Choose Photoshop EPS
Critical nuance:
✓ EPS container created
✗ Vector scalability depends on path usage
✗ Raster content may still be embedded
Photoshop EPS files frequently contain raster data unless paths fully define the artwork.
Step 8 — Verify output structure (mandatory QC)
Do not trust the extension.
Validation checks:
✓ Open EPS in vector software
✓ Confirm shapes are selectable paths
✓ Zoom heavily for curve stability
✓ Detect embedded raster imagery
Why: EPS validity does not guarantee vector geometry.
Structural limitations of Photoshop vector workflows
Photoshop path tools are designed primarily for:
✓ Masking
✓ Clipping
✓ Compositing
Not for production-grade vector construction.
Limitations include:
✗ No automated vectorization engine
✗ Less precise node management
✗ Limited vector cleanup utilities
✗ Inefficient for complex graphics
Common failure modes
Typical issues when attempting vector work in Photoshop:
✗ Excess anchor points from selections
✗ Irregular curve logic
✗ Hidden raster content inside EPS
✗ Misinterpretation of “EPS = vector”
Cons (technically framed)
✗ Subscription licensing cost
✗ Not intended for vectorization
✗ Manual reconstruction required
✗ Geometry cleanup often difficult
✗ Poor scalability vs vector-native tools
Practical conclusion
Photoshop can store and export paths, but it does not truly “vectorize” raster images. Any vector result requires manual geometric reconstruction. For production-grade vectors, vector-native applications remain structurally superior.
How to create a vector file in Inkscape?
Inkscape is a vector-native application and one of the most practical free alternatives for creating vector graphics. Unlike raster editors, Inkscape operates directly on paths, nodes, and curves, making it structurally suited for vector reconstruction and vector artwork creation.
Important baseline:
-
Inkscape → vector-first workflow
-
JPG / PNG → raster images (pixels)
-
Vector file → geometric paths (not pixels)
Creating a vector file in Inkscape is therefore technically valid, but the workflow and output quality depend on how geometry is constructed or reconstructed.
Critical nuance:
Importing a raster image into Inkscape does not automatically produce vector geometry. Vectorization requires path generation, either via tracing or manual drawing.
Two fundamentally different vector workflows in Inkscape
Inkscape supports two common scenarios:
-
Creating native vector artwork (best quality)
-
Vectorizing raster images (reconstruction from pixels)
These are technically different operations.
Workflow A — Creating a true vector file from scratch (production-grade)
This is the cleanest vector workflow.
Step 1 — Create a new document
-
Open Inkscape
-
File → New
Optional but recommended:
✓ Set document units (px, mm, cm)
✓ Define page size based on output context
Why: vectors are resolution-independent, but document units affect scaling logic and production workflows.
Step 2 — Use vector drawing tools
Common tools:
✓ Bezier / Pen Tool → precise path creation
✓ Shape Tools → rectangles, circles, polygons
✓ Text Tool → vector text objects
Best practice:
✓ Use minimal nodes
✓ Build smooth curves deliberately
✓ Avoid unnecessary anchor points
Why: vector quality is defined by geometric efficiency.
Step 3 — Refine geometry via node editing
Select the Node Tool.
Adjust:
✓ Curve smoothness
✓ Node placement
✓ Bézier handles
✓ Path continuity
Why: clean curves improve scaling, printing, and cutting stability.
Step 4 — Apply fills and strokes intentionally
Define:
✓ Fill colors
✓ Stroke width
✓ Stroke joins / caps
Why: visual appearance is controlled separately from geometry.
Step 5 — Save as editable vector master
Preferred master format:
✓ SVG (native Inkscape format)
Why: SVG preserves full editability and geometric structure.
Step 6 — Export for delivery if required
Common outputs:
✓ EPS
✓ PDF
✓ SVG (web / interchange)
Why: delivery format depends on downstream workflow.
Workflow B — Vectorizing a JPG / PNG image (reconstruction workflow)
Used when only raster artwork exists.
Step 1 — Import the raster image
-
File → Import → select JPG / PNG
-
Choose Embed
Why: ensures predictable document behavior.
Step 2 — Evaluate raster suitability
Good candidates:
✓ Logos / icons / silhouettes
✓ High-contrast graphics
✓ Limited colors
Poor candidates:
✗ Photographs / textures / gradients
Why: tracing engines convert pixel transitions into geometry. Complex imagery causes node inflation.
Step 3 — Initiate Trace Bitmap
-
Select the image
-
Path → Trace Bitmap
Choose strategy:
-
Single Scan → Brightness Cutoff → simple graphics
-
Multiple Scans → Colors → flat color artwork
Why: tracing mode defines segmentation logic.
Step 4 — Adjust tracing parameters deliberately
Key controls:
✓ Threshold / Colors
✓ Number of scans
✓ Smoothing
✓ Noise filtering
Typical failure mode:
✗ Excessive detail → unstable geometry and excessive nodes
Step 5 — Execute trace and confirm geometry creation
Click OK.
Immediately:
✓ Move vector result
✓ Hide/delete raster reference
Why: confirms vector paths were generated.
Step 6 — Perform geometric cleanup (mandatory)
Inspect for:
✓ Node inflation
✓ Fragmented shapes
✓ Micro-artifacts
✓ Irregular curves
Correct cautiously.
Why: automated tracing rarely produces production-stable vectors directly.
Step 7 — Quality control (structure over preview)
Check:
✓ Node density
✓ Curve stability
✓ Closed paths where required
✓ Absence of stray objects
Why: visual preview can hide structural defects.
Step 8 — Save/export vector output
Best practice:
✓ Save SVG master
✓ Export EPS / PDF if required
Important nuance:
Vector extension ≠ vector quality.
Common mistakes in free vector workflows
Typical structural problems include:
✗ Treating tracing as true conversion
✗ Ignoring node inflation
✗ Exporting without cleanup
✗ Assuming EPS/PDF automatically means vector
Advantages of Inkscape vector workflows
✓ No licensing cost
✓ True vector geometry support
✓ Full node/path control
✓ Suitable for print and cutting workflows
Limitations to understand
✗ Tracing requires cleanup
✗ Interpretation differences across applications
✗ Learning curve for path logic
✗ Complex imagery inefficient to vectorize
Practical conclusion
Inkscape is a technically valid tool for creating vector graphics and reconstructing vectors from raster images. Free software does not remove vectorization complexity — geometry quality still governs production reliability.
How to create a vector file for free?
Creating a vector file without paid software is entirely possible, but the technical principles remain identical to commercial workflows. Raster images (JPG / PNG) consist of pixels. Vector graphics consist of mathematical paths. A vector file is therefore created through geometric construction or reconstruction, not simple format conversion.
Critical baseline:
-
Free tools do not eliminate vectorization constraints
-
Changing file format ≠ generating vector geometry
-
Vector quality depends on path structure, not software cost
Historically, various online tools offered limited free vectorization. Over time, many adopted subscription models. This shift reflects service economics rather than any change in vectorization mechanics.
Reliable free workflows today primarily rely on vector-native desktop software.
Practical free vectorization routes
Two commonly used environments:
✓ Inkscape (fully free, vector-native)
✓ Adobe Illustrator (only free if already installed)
Raster editors alone cannot generate true vectors automatically.
Step-by-step tutorial — Create a vector file for free using Inkscape
Inkscape is the most technically appropriate free vectorization tool.
Step 1 — Evaluate whether vectorization is appropriate
Vectorization is most effective for:
✓ Logos / icons / flat graphics
✓ Line art / silhouettes
✓ Limited-color artwork
Poor candidates:
✗ Detailed photographs
✗ Gradients / textures
✗ Noisy JPGs
Why: tracing reconstructs geometry from contrast transitions. Complex imagery produces excessive nodes.
Step 2 — Import the raster image
-
Open Inkscape
-
File → Import → select JPG / PNG
-
Choose Embed
Why: ensures stable document behavior and avoids missing-link issues.
Step 3 — Inspect raster quality before tracing
Zoom significantly (200–400%).
Check for:
✓ Edge clarity
✓ Compression artifacts
✓ Noise / texture
✓ Small pixel dimensions
Why: tracing engines interpret defects as geometry.
Step 4 — Initiate Trace Bitmap
-
Select the image
-
Path → Trace Bitmap
Choose tracing mode:
-
Single Scan → Brightness Cutoff → simple logos / high contrast
-
Multiple Scans → Colors → flat multi-color graphics
Why: tracing mode governs how pixel transitions become shapes.
Step 5 — Adjust tracing parameters deliberately
Control:
✓ Threshold / Colors
✓ Number of scans
✓ Smoothing
✓ Noise filtering
Typical failure mode:
✗ Excessively detailed tracing → node inflation and unstable paths
Step 6 — Execute trace and confirm vector creation
Click OK.
Immediately verify:
✓ Move the traced object
✓ Hide/delete original raster
Why: confirms vector geometry exists.
Step 7 — Perform geometric cleanup (mandatory)
Tracing commonly produces:
✗ Excess anchor points
✗ Fragmented shapes
✗ Micro-artifacts
✗ Irregular curves
Cleanup actions:
✓ Delete stray objects
✓ Merge logical shapes
✓ Simplify cautiously
✓ Correct curves manually
Why: vector usability depends on geometric stability.
Step 8 — Quality control (structure over appearance)
Check:
✓ Node density
✓ Path continuity
✓ Curve smoothness
✓ Closed paths where required
Avoid relying on visual preview alone.
Step 9 — Save/export vector output
Best practice:
✓ Save editable master → SVG
✓ Export delivery format → EPS / PDF / SVG
Important nuance:
Vector extension ≠ vector quality.
Limitations of free workflows
Free vectorization environments impose practical constraints:
✗ Automated tracing artifacts
✗ Increased cleanup effort
✗ Learning curve for node/path management
✗ Geometry validation required
These are geometric realities rather than software defects.
Common misconceptions about free vectorization
✗ “Vector file = EPS extension”
✗ “Tracing = perfect conversion”
✗ “More detail = better vector”
✗ “Free tools produce lower-quality vectors by default”
Vector quality is governed by geometry, not pricing.
Practical conclusion
Creating a vector file for free is technically feasible, primarily through vector-native software such as Inkscape. However, vectorization still requires:
✓ Path reconstruction
✓ Node management
✓ Curve refinement
✓ Structural quality control
Free software does not reduce geometric discipline.
Do you lack knowledge of Adobe programs? Then you can use our vector service. We can make a vector file for you at an affordable price.
Create vector file online
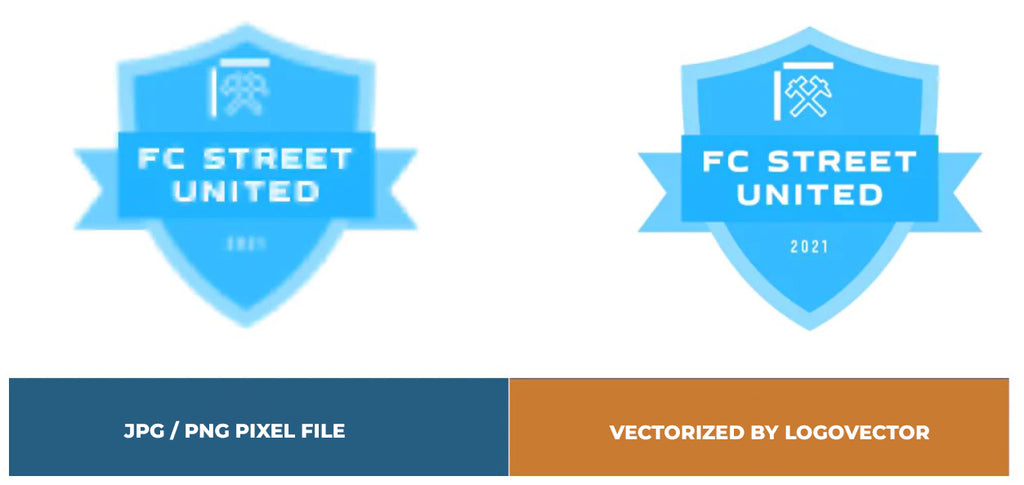
We are happy to help you on your way with the vectorization of your logo or image. You send us the logo in JPG, PNG or PDF and we convert the logo into an EPS vector file using Adobe Illustrator. We use the pen tool and recreate the logo manually with the correct fonts. Then we export the new vector logo in an EPS file so you can get started!
Advantages of vector file creation by Logovector:
- Perfect quality (Made by designers with 10+ years of experience)
- We vectorize images, photos, logos and drawings
- Fast delivery within 10 hours
- All necessary file types: EPS, AI, SVG, PDF
- Very easy to order via the website
- Small adjustments are possible
- One-time payment (very attractive price)